This recipe may be my new favorite (and as the coworkers say, my new best). It’s simple since it uses no power tools, i.e. the Kitchenaid, and just fun to whip up with a little elbow grease.

Warning: if you hate chocolate goodness that melts in your mouth like pudding, this isn’t your recipe.

Flourless Chocolate Cake (Chocolate Torte)

9 ounces butter, melted (I used Kerrygold.)

9 ounces dark chocolate, finely chopped

1 1/2 cup sugar

7 large eggs

1 teaspoon vanilla

1/4 teaspoon almond

Melt the butter and chocolate together and whisk until smooth. Add the sugar and combine fully. Allow the mixture to cool slightly, then add the eggs one at a time mixing each in. Add the extracts. Pour into a well-greased and parchment lined springform pan. Tap out the air bubbles. Place pan on a cookie sheet to prevent any mess, and bake in a 350 degree oven for 35 to 40 minutes. Watch closely at the end. You want the center to still giggle when you take it out.

We have concocted the perfect cocktail for your weekend activities. The best part is you can customize it as you see fit (or your tastebuds do). Since I love the blueberry lemonade at Mammy’s Cupboard, I used their recipe as a base and built this drink from there. Get the girls together and enjoy!

Blueberry Lemonade Cocktail (or Champade)

1 cup blueberry juice

1 lemonade concentrate, thawed

Water

Champagne

Vodka

Combine the juice and lemonade mixture in a pitcher and fill with water. To adjust the sweetness, add sugar to taste. Depending on your preference, top off each glass you pour with either champagne or a shot of vodka (or both) and enjoy!


canva-lime,-citrus-fruit,-green,-summer,-juicy,-fruit,-sour-MACZiekRkXs

So, this went better than expected. I played with a recipe I had on hand for a cheesecake and doctored it into a key lime version for another Country Roads office lunch. It was a hit! One particular co-worker was cleaning the excess from the spatula I used to serve everyone. Good to the last drop!

Now, instead of serving with whipped cream or a sour cream topping, I sugared down fresh Ponchatoula strawberries. That really made it.

Key Lime Cheesecake

1 graham cracker crust

4 limes, juiced and zested

16-ounces cream cheese, softened

3/4 cup sugar

2 teaspoons vanilla

2 eggs

In a stand mixer, beat together cream cheese, sugar, vanilla, and eggs. Once combined, add the lime juice and zest. Once incorporated, pour filling into pie crust. Bake in a 325 degree oven for 45 minutes or until the center is set. Watch closely since the top of the pie will brown. Allow to cool completely and then refrigerate before serving.


I’m back to the mixer this weekend making sugar cookies for an upcoming bachelorette trip, but I thought I’d share this simple sugar cookies recipe that doesn’t require a rolling pin or cookie cutter. They are a little sandy in texture, but fluffy and delicious! They would be fantastic with a little lemon zest.

Amish Sugar Cookies

1 cup butter softened

1 cup vegetable oil

1 cup granulated sugar

1 cup powdered sugar

2 large eggs

2 teaspoons vanilla

4 1/2 cups all-purpose flour

1 teaspoon baking soda

1 teaspoon cream of tartar

In a stand mixer, beat together butter, sugar, and oil. Beat in eggs and vanilla. Add in the baking soda and cream of tartar. Gradually add flour to the butter mixture, beating until just combined after each addition. Do not overmix. Line baking sheets with parchment paper or silicone baking mats. Drop dough by small teaspoonfuls onto baking sheets. Bake at 375 degrees for 8-11 minutes, or until edges and bottoms are lightly browned. Remove to wire racks to cool.

Lately, I think you are aware that I’ve been baking like a mad woman since my best friend, Kitchen Aid, entered my life. She is shiny and bright, always works to her best abilities, and keeps me sane. However, this recipe I whipped up a couple of weeks ago for a Country Roads staff lunch didn’t require anything more than a good old-fashioned dose of elbow grease and patience. The original recipe was found on inspiredtaste.net, and all I did differently was leave out the almond extract.

IMG_3191

Fresh Strawberry Pie

Chilled pie dough

5 cups strawberries, chopped

1/4 cup cornstarch

2/3 cup sugar

1/8 teaspoon salt

1 teaspoon vanilla extract

Juice of lemon

1 egg yolk

1 tablespoon cream

Whipped cream, optional topping

Roll out pie dough to fit pie dish. Gently press dough down into dish so that it lines the bottom and sides of the dish. Fold edges of dough underneath itself, creating a thicker, 1/4-inch border that rests on the lip of the dish. Then, crimp edges.

Heat oven to 425 degrees, and place a baking sheet on a middle oven rack. Pierce bottom of the crust with a fork. Line the crust with two sheets of aluminum foil.  Then, fill foil with dried rice, dried beans, or pie weights. Refrigerate 30 minutes, freeze for 10 minutes, or until firm to the touch.

Place pie crust onto preheated baking sheet and reduce oven temperature to 400 degrees. Bake 20 to 30 minutes or until the crust is golden. Make egg wash by whisking egg yolk and cream in a small bowl. Then, remove rice, beans, or weights and foil from pie crust. Brush bottom and sides of crust with egg wash. Bake until egg wash is dry and shiny, 3 to 5 minutes. Cool crust completely before filling.

Add 2 cups of strawberries to a small saucepan. Mash strawberries until chunky. Add sugar, corn starch, vanilla extract, lemon juice, and salt. Bring to a simmer over medium heat and cook, stirring occasionally, until sugar dissolves and glaze has thickened. Cool completely. Combine remaining 3 cups of strawberries with cooled strawberry glaze. Stir until strawberries are well coated. Spoon strawberry filling into cooled pie crust. Refrigerate overnight and top with whipped cream before serving.


Remember that one-pan fish dinner we made a couple of weeks ago? I revisited it with a Mexican flair for our first Lenten Friday feast last week. I modified the spice mixture and changed some of the vegetable to fit a fajita-like topping for our tacos. Also, we went light by using lettuce as our wrap versus traditional tortillas. Here’s what we ended up with:

IMG_3172

It was delish! The peppers and onions were perfect. And the fish topped with a dab of guacamole and the fresh lime crema sauce … YUM!

Fish Tacos with Marinated Vegetables and Lime Crema

For the marinade:

Zest and juice of 1 lemon

Zest and juice of 1 lime

1 cup extra virgin olive oil

1 1/2 tablespoons minced garlic

1 teaspoon coriander

2 teaspoons cumin

2 teaspoons paprika

Salt and pepper to taste

For the tacos:

8 white perch fillets, dried completely

1 pound cherry tomatoes

1/2 Vidalia onion, sliced thinly

1 red bell pepper, sliced thinly

1 yellow bell pepper, sliced thinly

1 orange bell pepper, sliced thinly

1 head bib or large leaf lettuce

For crema:

1/4 cup sour cream

3 tablespoons mayonnaise

Zest and juice of 1 lime

1/4 teaspoon salt

Preheat the oven to 450 degrees. In a large mixing bowl, whisk the marinade ingredients together. Add the peppers, tomatoes, and onions; and toss to coat with the sauce. With a large slotted spoon or spatula, transfer the vegetables to a large baking sheet. Keep the vegetables to one side or one half of the baking sheet and make sure they are spread out in one layer. Now, add the fish to the remaining sauce, toss to coat. Transfer the fish to the baking sheet next to the vegetables and pour any remaining sauce on top. Lightly sprinkle the fish and vegetables with a little salt. Bake in the 450 degrees heated oven for 15 minutes. Then transfer the baking sheet to the top oven rack and broil for another 3 – 5 minutes, watching carefully. The cherry tomatoes should begin to pop under the broiler. When ready, remove the tray from the oven.

To prepare the crema, combine the ingredients in a small bowl and chill until ready to serve. Build your tacos into the lettuce piece and top with crema, guacamole, or salsa.

I think I’ve finally got the royal icing game down pat. I’ll be honest. The people that refer to themselves as cookiers are real artists. That shit is not easy. I’m not patient one bit, so this is extremely trying for me. But, it’s probably good practice for me. Oh, and other thing. Thank God for my mixer. Without that beautiful piece of machinery, none of these adventures in baking would be possible.

Now this new recipe makes one big think batch of icing. You will then need to divide and add water and coloring as needed. This is where the guesswork starts, and I’m sure there is a science to it. But that’s not something I know anything about. I’m just trying as I go along. This one came from a Pinterest post that led to a blog called noshtastic.com. There are several great tips on that blog for cookie making.

IMG_3104

Royal Icing

2 pounds powdered sugar

1/2 cup meringue powder

1 cup water (minus 1 tablespoon)

Add in the meringue powder and water into the mixing bowl of your stand mixer and beat together for a few minutes until frothy. Add in the powdered sugar and mix together slowly until all the liquid and powdered sugar is combined. If you have a stand mixer set it at a medium high speed and beat it together for 4 minutes with the paddle attachment, don’t forget to set a timer! Your icing should have semi-stiff peaks (see photos in post) when the icing is ready, not floppy peaks! If the icing is not quite stiff enough then watch closely and beat for one more minute and check it again.

Ok, if you’ve been following along on Snapchat, you know that my parents and their four dogs have moved in with me while they work on putting down a new floor at home. Now, this would be completely fine (I mean, I love all dogs more than humans.), but it has been raining for 40 days and 40 nights. So, my yard is a mud pit. Every surface is covered in sheets and furniture covers. We go through at least 4 or 5 towels a day. Thank God I got a new washer and dryer last year. Also, these labs are very lovable but large. They could be in a sound sleep one second and in your face for a hug and make out the next. You have to be on guard at all times.

My main point to bring them up is that you can imagine the wet dog scent permeating throughout my house. I luckily came across a post about simmer pots early last week and how they work better at neutralizing odor than candles. Also, Joanna Gaines swears by them; and we all know if Jo loves it, I love it more. So, I gave them a try. The coffee ground and vanilla pot I first tried didn’t bring me joy. There was little to no scent, and I needed major smell fast. So, I went for a lime and rosemary concoction and added vanilla. It was delicious smelling. You need to try this as soon as possible. Fun fact, if you leave the lid on the pot for a while, the scent will be stronger if you need it quickly before guests show up.

Lime and Rosemary Simmer Pot with Vanilla

4 limes

6 sprigs rosemary

4 tablespoons pure vanilla extract

Water

Bring a heavy pot of water to a rolling boil. Drop in the rosemary (I pulled the leaves from the stems to get the oils going). Slice 3 of the limes and juice on of the limes into the pot. Stir and bring back to a boil. Add the vanilla. Stir. Turn the heat down and let simmer for several hours. Watch the water level and add more as needed.

Have I mentioned we have an abundance of white perch in the Guido freezer? So new recipes to try are high on our list of things to find in magazines, cookbooks, cooking shows, and (of course) Pinterest. This week, I turned to Pinterest to find a fish and veggie recipe that was light and would be divine over rice. And I found it. Behold — the one sheet white perch feast dressed in a dill, oregano, and coriander olive oil dressing. The recipe called for halibut, but we deal in perch.

One-sheet White Perch with Green Beans and Cherry Tomatoes

For the sauce:

Zest and juice of 2 lemons

1 cup extra virgin olive oil

1 1/2 tablespoons freshly minced garlic

2 teaspoons dill weed

1 teaspoon dried oregano

1/2 to 3/4 teaspoon ground coriander

Salt and pepper to taste

For the fish:

1 pound fresh green beans

1 pound cherry tomatoes

1 large yellow onion, sliced thinly

4 – 8 white perch fillets, dried completely

Preheat the oven to 450 degrees. In a large mixing bowl, whisk the sauce ingredients together. Add the green beans, tomatoes, and onions; and toss to coat with the sauce. With a large slotted spoon or spatula, transfer the vegetables to a large baking sheet. Keep the vegetables to one side or one half of the baking sheet and make sure they are spread out in one layer. Now, add the fish to the remaining sauce, toss to coat. Transfer the fish to the baking sheet next to the vegetables and pour any remaining sauce on top. Lightly sprinkle the fish and vegetables with a little seasoned salt. Bake in the 450 degrees heated oven for 15 minutes. Then transfer the baking sheet to the top oven rack and broil for another 3 – 5 minutes, watching carefully. The cherry tomatoes should begin to pop under the broiler. When ready, remove the tray from the oven. Serve immediately over wild rice.

IMG_2991

Let me start by saying that I’m no “cookier.” I simply watch a handful of decorating videos on Instagram and Facebook each day, and I finally got the courage to give it a try myself. I was geared with all of the necessary tools, my mixer was prepped and ready, and (thanks to a last minute trip to Wal-Mart) I had these neat little decorating pens to help make the decorating portion of the evening a little simpler.

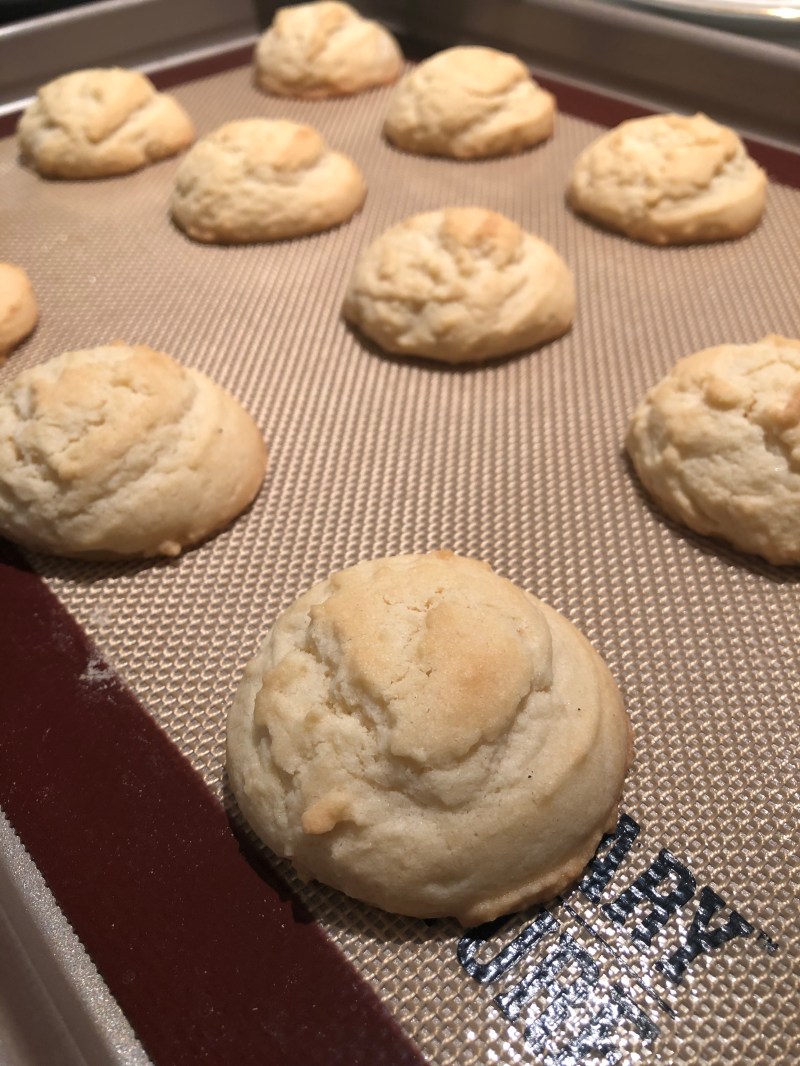
Years ago when I was working on a story about Christmas cookies, my cookie-making cousin, Zelma, shared her sugar cookie and royal icing recipe with me. I can honestly say that these are some of the best sugar cookies I’ve ever tasted. They are not too sweet, not too almond-y, and the perfect bit of crunchy. When I started on the icing recipe, I did hold back on the amount of almond extract I used. I don’t tend to like too much of that flavor in cakes, cookies, or anything for that matter. So, you can go crazy with it if you’d like. It’s just not my taste.

Oh, and my first cookie to decorate was a disaster.

img_2981

They really mean it when they say flooding the cookie. Also, I think I didn’t beat the icing long enough with the mixer. After adding more coloring through the process, it finally stiffened up.

Vanilla Almond Sugar Cookies

3 cups flour

2 teaspoons baking powder

1 cup sugar

2 sticks butter, softened

1 egg

1/2 teaspoon vanilla extract

1/2 teaspoon almond extract

Preheat oven to 350 degrees. Cream sugar and butter in mixer, then add the egg and extracts and mix thoroughly. After combined, add the baking powder and then slowly add the flour until all combined. Half the dough and wrap in plastic wrap. Chill for at least an hour. Remove the dough, roll it out, and cut out the cookies. Repeat until all of the dough is cut. Be sure to keep the dough chilled through the entire process. Placing the baking sheets in the refrigerator will help the cookies to not spread in the oven. Bake the chilled cookies for 10 to 12 minutes or until golden brown. Cool completely once they are removed before icing.

Royal Icing

8 tablespoons meringue powder

1/2 cup water

1 pound powdered sugar

Cream of tartar

1/2 teaspoon karo syrup

1/2 teaspoon almond extract

Combine meringue powder and water in the mixer and beat until frothy. Slowly add the powdered sugar and mix until combined. Then, add a few shared of cream of tartar, extract, and kart syrup. Beat on medium to high for 5 minutes until the icing is thick. Add  coloring as needed.

CrazyRichAsiansBook_main

A while back, I wrote about different audiobooks I was going through on Audible during my Monday drives. I had listed to Crazy Rich Asians before watching the movie and loved that I did it that way. The book has much more detail to it and added to the movie so much for me. Recently, I trekked through the second and third installments of the trilogy and really wish that Kevin Kwan would go in for a fourth. The detail he puts into his characters, their language, and the intricate plot lines is phenomenal. I have loved every minute; and trust me, these are lengthy reads. I hope they are planning to make these into movies, too. Crazy Rich Girlfriend was my favorite of the series and would be hysterical on the big screen.

Give them a listen; and if you have any suggestions for my listening pleasure, SHARE!

I was scrolling through my photos on my iPhone (I have a lot of storage, so there were tons to sift through) looking for a recipe we’ve tried to share with you. I came across this amazing looking spread of miniature cupcakes my mom made for a Garden Club event last spring. Since it’s February finally, that means that prep can begin for another busy spring of events here in Natchez. Keep this simple recipe on hand for your potluck for anything from Valentine’s Day to Easter Sunday.

img_1341

Strawberry Cupcakes with Vanilla Icing

For cupcakes, use a strawberry mix and prepare as directed in miniature cupcake tins.

For icing:

2/3 cup Crisco (butter or regular)

1-pound box powdered sugar

1 teaspoon vanilla extract

1/8 cup water (for mixing)

Beat all ingredients with a hand mixer until smooth.  More water can be added if needed. Use a piping bag with decorative tip to ice the cooled cupcakes and top with sprinkles.


After spending the weekend in a Benadryl/Mucinex fog, I thought I’d share a round up of what I finished on the AppleTV the past few days.

fa2e5a33d77623d4dfa03cbf850383e6c1fe0e9f

You (Netflix)

Now, I originally started this series on Lifetime in the fall when it premiered. However, I lost track 3 episodes in. I kept hearing people mention it over the past couple of weeks and thought what better time to binge through? It did not disappoint. I can’t wait for the follow up season (whenever that may be).

conversations-with-a-killer-ted-bundy-tapes-netflix

Conversations with a Killer: The Ted Bundy Tapes (Netflix)

Another series that did not disappoint. I went in knowing the basic amount of Ted Bundy history, but I knew I’d be hooked to this in depth take on his terror in the 70’s. To hear his own take on his crimes was interesting, but can you believe someone actually married that freak? And can you believe Zac Efron is playing him in the upcoming biopic? I mean, I’ll go see it. But it’s going to ruin that beautiful man for me.

fyre-festival-docs-netflix-hulu-review_fullsize_story1

Fyre Fraud (Hulu) vs Fyre: The Greatest Party That Never Happened (Netflix)

Ok. Watch the Netflix documentary first. It gives more detail that the Hulu one misses. Plus, I didn’t know anything about this before watching. So, seeing Billy McFarland try to get through that interview in the Hulu special without throwing up on himself was entertaining by itself. I’m left with a lot of questions though. 1. Who would pay that much money for that? 2. Were these employees of his in a cult? Was he their leader? Do they need Leah Remini to save them? 3. How is Ja Rule still a thing? I’ll be interested to hear more opinions on this.

IMG_2364.jpeg

I have a love for cheese. However, after my gallbladder incident 4 years ago, I had to break up with it for a while. I’m slowly working my way back into its good graces, but it’s hard to say no to a good cheese tray.

Over the holidays, I tried my hand at perfecting the cheese board for a couple of get togethers. I researched Pinterest to see what all of the professionals think is the key to a good cheese board. Hard cheese. Soft cheeses. Fruits. Vegetable. Nuts. Crackers. Bread. Jellies. and Jams. Everyone had a different take, but all stayed consistent on one thing. Cover the entire platter. Leave no open space.

So, off to Whole Foods I went in search of the perfect cheeses and accoutrements. Here is what works for me:

Cheese for Days Plate

1 block sharp or white cheddar cheese

1 block Edam cheese

1 roll goat cheese

Halved walnuts

Blackberries

Hot-pepper jelly

Wafer crackers (I used a sea salt and cracked pepper cracker and a rosemary cracker.)

Start by arranging the 3 cheeses in separate corners of the platter. Circle the cheese with the crackers of your choice. Place a bowl of pepper jelly near the cheddar and Edam cheeses. Create a mound of the berries near the goat cheese. Fill in your gaps with the walnuts. Make sure to have a cheese knife set to help with self serving of the cheeses.


So, I’ve really dived deep into the KonMari effect. I’ve changed the way I fold. I’ve thrown away more shoe boxes than is reasonable to have found in my closet. I’ve donated 5 large bags worth of clothing, and I haven’t even touched what is hanging in my closet. I’m working through the kitchen now and finding so much space. It’s amazing what gets pushed back in the pantry. Plus, those baskets are key to organizing that mess. I’ve found that keeping things together in families helps me see what I’m looking for rather than hunting for it.

I mentioned last week that I was working on my T-shirts. I was able to purge down all of my dresser drawers to where I have 3 empty at the moment. THREE! I can’t wait to keep going and see what I’ll get rid of. My house already feels like its lost 30 pounds of nonsense.


Who else is Marie Kondo-ing their life? I just started watching the show after hearing about her book several years ago and seeing several posts about it recently. While I don’t think I have quite the problem as most of her clients, this has been so helpful to spark me into my annual purge. I usually try to clean out my closet each year, but this year I think the entire house needs a once over. Every drawer, cabinet, and closet will get reorganized. After finding all of those plastic bags at the beginning of the year, I decided that I can probably end up with an empty kitchen cabinet at the end of this.

I. Can’t. Wait.

One way that our family likes to add in a green vegetable during the holidays is with a pan of these delicious green bean bundles. They are smothered in butter, brown sugar, and soy sauce, which makes them sweet and savory at the same time. During the year, this is also a simple combination to dress up a can of green beans on a Tuesday.

Green Bean Bundles

3 15-ounce cans whole green beans

1 package bacon, cut in half

1 cup brown sugar

1 cup melted butter

1/2 teaspoon garlic salt

Drizzle of soy sauce

Using the bacon strips, secure 5 to 10 green beans into a bundle with a toothpick. Place bundles in a 9-inch by 13-inch baking dish and cover with the marinade of brown sugar, butter, soy sauce, and garlic salt. Refrigerate overnight. Bake at 350 degrees for about 30 minutes uncovered.

img_2719

I’ve always considered myself as someone who can clean out and throw away when it comes to cabinets, closets, and drawers. As I’ve been putting up Christmas, I’ve been creating a pile to be donated. I learned over the weekend that I do indeed hoard a good bit. When I was forced to clean up my kitchen cabinets, I found an unbelievable amount of plastic shopping bags crammed into the crevices of my kitchen eating up valuable storage. About a year ago, I did make the change to paper when faced with the question “paper or plastic.” I can recycle those each week, and they tend to stand up better when getting from my car to the house in one trip. However, one store in particular does not offer paper options. (Damn you, Wal-Mart.) So, to the trash they went; and I vowed to not keep a single bag this year.

What have you cleaned out in 2019 that shocked you?

I have to say that the only gift I needed to open Christmas morning was my brand new stainless KitchenAid stand mixer. I couldn’t believe it and had to ask my mom if it was real or just a trick. I couldn’t wait to plug her up and take her for a spin. First up, chocolate chip cookies. These that I made were the best I’ve ever had. They were soft with just the right amount of chocolate plus the crunch from the pecans I added. Mom did give me some good advice as I went through the baking process. I’ll be honest; I’m not a patient baker. However, the speed of the mixer helped cut that anxiousness I feel when the mixing takes too long or I can’t get something perfect. She did say to beat that butter (which you have to melt first) and sugar until it is creamy and thick. Also, add in the dry baking soda and salt before the flour. This will get those two incorporated well before they get lost in the flour. I also doubled this recipe, so I ended up with 3 dozen cookies. Be sure to watch them closely in the oven. That real butter bakes quickly.

Chocolate Chip and Pecan Cookies

8 tablespoons unsalted butter, melted

1/2 cup white sugar

1/4 cup packed light brown sugar

1 teaspoon vanilla

1 egg

1 1/2 cups all purpose flour

1/2 teaspoon baking soda

1/4 teaspoon salt

3/4 cup chocolate chips

1/2 cup chopped pecans

Preheat the oven to 350 degrees. Microwave the butter for about 40 seconds to just barely melt it. It shouldn’t be hot – but it should be almost entirely in liquid form. Using a stand mixer, beat the butter with the sugars until creamy. Add the vanilla and the egg; beat on low speed until just incorporated – 10 to 15 seconds or so (if you beat the egg for too long, the cookies will be stiff). Add the baking soda and salt, and mix in. Then slowly add the flour. It should form one large ball that is easy to handle Add the chocolate chips and pecans and incorporate evenly with a spatula. Scoop out the dough with a 1 ounce ice cream scoop and place on a cookie sheet. Bake for 9 to 11 minutes until the cookies look puffy and dry and just barely golden. Let them cool slightly before transferring to a rack to cool completely.

I took a couple of quizzes over the weekend that gave me two words to use as my “word of the year.” One told me “delight” should by my word. I like the idea, but I needed something a little stronger. I took another, and it told me “ambitious” was supposed to be my word.

During 2018, I had a client tell me after we closed a contract that I had been very ambitious during the process. I think that makes a point that I need to use that same mind set throughout the entire year with all of my clients at work and then at home, too. So, I’ll be ambitious with my cleaning, ambitious with my baking, and we will see what else.

Happy 2019, everyone!

We love a good Brussels sprout recipe. Whether roasted or thrown in a casserole, we’ve tried several ways to cook up the tiny cabbages. Here is one way I tried for Christmas Eve as an easy pick up. It was one of those Facebook recipes from Delish that popped up on my feed. I thought, why not? While it is a bit time consuming, the end product is pretty good.

Stuffed Brussels Sprouts

1 pound Brussels sprouts, trimmed and halved
1 cup ricotta
1/2 cup freshly grated Parmesan, plus more for sprinkling
1/4 cup Italian bread crumbs
Zest of 1/2 lemon
1 clove garlic, minced
Salt and pepper to taste
Preheat oven to 400 degrees. Grease a large baking sheet with cooking spray. In a large pot of salted boiling water, blanch Brussels sprouts until bright green, 2 minutes. Rinse under cold water, then drain. Using a small spoon, scoop out insides of sprouts, then transfer hollowed sprouts to a prepared baking sheet. In a medium bowl, stir together ricotta, Parmesan, bread crumbs, lemon zest, and season with salt and pepper. Spoon mixture into Brussels sprouts, and sprinkle with more Parmesan. Bake until ricotta mixture is warmed through and Brussels sprouts are crispy, 20 to 25 minutes.

I love Gingerbread in all shapes and sizes. I don’t love making those rolled out, cut, and decorated cookies so much. So, I found the perfect happy medium. These Gingerbread Crinkle Cookies are chewy on the inside and full of spice. I’m daydreaming about them now.

Gingerbread Crinkle Cookies

3 cups all-purpose flour

3/4 cup  dark brown sugar, packed

3/4 teaspoon baking soda

2 tablespoons Red Stick Spice Gingerbread Spice blend

1/2 teaspoon salt

12 tablespoons unsalted butter, softened and cut into cubes

3/4 cup sorghum molasses

2 tablespoons milk

1/2 cup granulated sugar

1/2 cup confectioners’ sugar

Stir together the flour, brown sugar, baking soda, spices, and salt. Add the butter pieces. Mix at medium speed with a hand mixer until the mixture is sandy and resembles fine meal. With the mixer running, gradually add the molasses and milk. Mix until the dough is evenly moistened. Mix until thoroughly combined. Scrape the dough onto a work surface; divide it in half. Working with one portion at a time, shape the dough into two round disks. Cover them in plastic wrap and freeze until firm, or refrigerate the dough overnight.
Preheat the oven to 350 degrees. Line the two baking sheets with parchment paper or a baking mat. Take the cookie dough out of the fridge and begin rolling the dough into balls, about 2-inches in diameter. Be careful not to overwork the dough as it will lose its chill and get too warm. Roll each dough ball in the granulated sugar until coated. Transfer ball to confectioners’ sugar and roll again until coated evenly. Place the coated dough balls 1-inch apart from each other on the prepared baking sheet.
Bake the cookies until set in the centers, 12 minutes. Do not over bake. Cool the cookies on the sheets, and then remove the cookies to a wire rack to cool to room temperature. Store gingerbread crinkle cookies in an airtight container at room temperature.

There’s only one week left until Christmas Day, and I thought I’d come from under my research in postpartum blogs and recipes of lactation cookies (If you missed it, baby Wes is finally here; and I have the cutest cousin in the world now.) to share my favorite part of Christmas with you.

Ever since my Nannie, Doris Guido, passed away 10 years ago, Christmas has been a little grayer and a little less magical without her. Thankfully I have several pieces of her around my house to make it feel like she’s still around, and at Christmas time she’s everywhere because of her ornaments and decor I now call my own.

She was a stickler for her white flocked tree and giving it a very mauve and pastel appearance with its decorations. The living room it lived in was one of antique furniture in floral patterns and pink, plush velvet, so traditional reds and greens just didn’t fit. She also liked to embellish the decor a little (ok, maybe a lot) with little hints of ribbon and holly. Don’t even get me started on her gift wrapping. Each present under the tree was carefully wrapped, tied with a real ribbon, and donned with extras like snowflakes or holly.

However, one little bit of extra has always stuck out to me. Her collection of mid-century ornaments with painted frost over the aqua blue glass tucked in so nicely to her tree. One of the ornaments was special though and received the Nannie touch. She added a small spring of faux holly to the top of the bauble. Today, it is always featured on my bedroom tree with the rest of her ornaments, and it’s my favorite to find the perfect placement for each year.

Having those little pieces of her make Christmas happy again and make these last ten years without her seem a little less gray.

img_2044.jpg

Yet another recipe from Suzi’s book of favorites. She always talks about her mother making these overnight cookies when she was growing up. What a fun project with your kiddos this weekend?!

Goodnight Cookies

2 egg whites

1/2 cup sugar

6 ounces chocolate chips

3/4 cup nuts (pecans), chopped

Dash vanilla extract

Dash cinnamon

Preheat oven to 350 degrees. Beat the egg whites until stiff. Fold in the remaining ingredients until combined. Drop mixture by the teaspoon on a foil-lined baking sheet. Put in the oven, turn off the heat, and forget until morning.


12342352_10205269639282495_3513684828818496475_n

It’s time to get on my soap box for my top pet peeve — the gift of puppies at Christmas. I know. It is adorable. Those kids are thrilled. All is right in the world while that puppy plays in piles of discarded wrapping paper.

BUT. Think about a week later when you’ve been up all night and the kids are snug in their beds. Think about what happens when they go back to school and you’re back at work in January. Most people aren’t lucky like I am to have a built in doggie daycare in the form of MawMaw and PawPaw (also known as Paul and Suz). You’ll be tempted to make that post on Facebook to re-home that little ball of fur.

Don’t get me wrong. I always asked for puppies at Christmas, but we are a different breed of dog people (and my parents knew how to say no). When we were growing up, our dogs stayed outside; but we played with them. We would come home from school, get into the backyard, and spend hours running around the yard with the dogs. We didn’t play video games. We didn’t have the internet until I was in the 8th grade. Our dogs were our after-school activity. Now that I’m an adult and have 2 children, I mean, dogs of my own, nothing makes me madder than seeing those people who had to give in to their kids’ wishlists and get them a puppy post they are ready to regift a family member.

22687840_10210246303095980_6858690286940840253_n

Now, here comes the warning. If you have the slightest thought of getting a puppy for Christmas for your kids this year, go ahead and unfriend me. Block me on Instagram. I’ll be watching you otherwise. And when you go back in mid February and make that post saying “free to a good home” or “we just don’t have time for him”, beware. I’ll call you out  on that post because you are the worst of the worst. I won’t feel bad about it either. Your kids will eventually move on and forget, but that dog won’t. Dogs get attached. Dogs become a part of the family the moment you bring them home and begin to trust you. When you give them away or let them run off or don’t have time for them, that changes that dog.

So, you’ve been warned. Merry Christmas. Get them a stuffed animal instead.

As a Christmas present the first year that my parents were married, my grandmother gifted a custom-bound book to fill with her favorite recipes. I’ve seen this book come out of the cabinet all of my life and know that it is filled with recipes that I’ve grown up with and love. One particular recipe that I demand make it’s appearance each Christmas season is for my favorite cookie, Childhood Thumbprint Cookies. The dough is that of a buttery shortbread, and it is filled with a dark fudgey chocolate that I could eat by the spoonful (and maybe have over the years).


Childhood Thumbprint Cookies

For dough:

1 cup butter

2/3 cup sugar

2 egg yolks

1/2 teaspoon vanilla

2 1/4 cup flour

1/2 teaspoon salt

For frosting:

1 cup sugar

1/4 cup cocoa

1/4 cup milk

1/4 cup butter

1/2 teaspoon vanilla

To make the dough, cream butter and sugar. Add egg yolks and vanilla. Add flour and salt. Mix well and chill. Roll into 1-inch balls and flatten with thumb. Bake at 300 degrees for 20 to 25 minutes.

To make the frosting, cook sugar, cocoa, butter, and milk. Bring to a boil. Boil for 1 1/2 to 2 minutes. Remove from the heat. Stir in the vanilla. Beat until the desired consistency (a thick, shiny fudge). Top each cookie thumbprint with a teaspoon full of chocolate and allow to harden. Keep in an airtight container (and hidden so no one else will eat them).


Maybe the average Christmas tree parent doesn’t encounter issues with their decor. Maybe it’s like a free-for-all of tree problems at my winter wonderland because there is one in each room. However, when I came home Sunday night to find my birds and squirrel themed tree on my dining room floor, I felt like I was in the twilight tree zone. After a second tumble while I was in the shower, I was ready to get a new one and throw that particular artificial tree on the curb.

IMG_2211.jpg

BUT when Mom and Dad stopped by Monday morning to assess the damage, they found a possible culprit. Jo (the Beagle) was happily running through the house with one of the bird ornaments that resembles a ball of yarn. I mean, the tree is dedicated to she and Jackie’s favorite prey; but after having it up every year, I figured that they were over the tree ornament grab and run. Maybe not. We still have a few weeks to go.

IMG_2014

What do I remember most about Christmas morning at Nannie and PawPaw’s? (Other than the flocked, white tree?) I remember my grandfather, TJ Guido, carefully making up a punch bowl filled with homemade Egg Nog. He spent time whipping the cream by hand and making sure to get the recipe just right. Of course, it was the adult version of egg nog, so I never indulged. Now, I’m still not a fan, but Paul Guido sure is. Here is the recipe they went by year after year.

Egg Nog

1 carton whipping cream

12 eggs, separated

2 cups sugar

1 pint whiskey (or rum)

1/2 gallon sweet milk

Nutmeg

Beat cream. Blend yolks and sugar. Add to cream. Add the milk. Fold in egg whites. Add whiskey. Sprinkle nutmeg on each cup to taste. Can put in punch bowl and will not separate.

As most of you know, I am carrying on the Guido Christmas tradition of having a white, flocked tree each year as my Christmas centerpiece. My grandmother’s tree was epic each year. With her large bay window in the living room, she could afford to get the fattest tree on the lot. She went for short and fat, and she got it right every year. Mom and Dad were always on hand to help with the flocking process; so when I bought my house with a large window in the living room, we knew I would take up the tradition.

IMG_2740
See? I’ve been Christmas obsessed since the early 90s.

Now, over the years, I’ve traded her pastel and mauve ornaments for traditional reds and greens to stand out for the passersby. (Don’t worry. Those “Nannie” ornaments now live on my bedroom tree each year.) And this year was poised to be the best tree yet with the edition of those retro colored lights added to the white lights for a little pizzazz. However, the flocking gods had other plans this year.

In early November, I went to the same old site to get the same old flocking fiber refills that I get every year. I always start the year with five pounds of flock to make sure I have enough to get through the tree. I usually only need 3 or at most 4 pounds, but you just never know how the flocking will go once you get started. When the flock came in, the bags weren’t in the refill packages that I’m used to. They were just Ziploc bags of flock. So I had a slight panic wash over me while looking at this $100-worth box of alien flock. After some Googling and frantic emailing to Fowl Flocker, I found out that Peak Seasons no longer makes the refill packages of flock for my particular flocking apparatus/gun. Again, I panicked. I started looking for new flocking methods. Some said to use a sieve to “dust” the flock. (Yeah right.) Others suggested buying the industrial flocking machine. (Hell no to $1,000+.) Finally, I found a “snow blower” perfect for the amateur flocker. (What a sentence.) So, I was ready.

The morning after Turkey Day, we bought our pre-painted real Christmas tree, got it into the stand, and trimmed the excess limbs to create shape for the flock and the hundreds of lights and ornaments to decorate with. Now, time to flock. The new apparatus called for a spraying of water over the tree as the first step, then the flock was the go on with more water. Already, we’re adding more water than we usually do; and the process calls for a final spraying of water after the flock has been applied. The first pound of flock is poured into the bucket, on goes the shop vac, and bam. The pound of flock is gone. I think I went white lipped. We’ve only made one pass up and down the length of the tree and we’re a pound of my five pounds down. Shit. So we started to strategize this process. Dad handled the bucket. I worked the shop vac power switch. Within 5 more minutes, the flocking was finished. Now to add (more) water to activate the adhesive in the flock. Then the entire tree drooped. More panic. It just needed to dry. Yeah. Dry! Remember now, it was humid as all get out this weekend. That can’t be good for flocking with this much water. So, we decided to let it sit in the carport overnight and think about what it did.

The next morning, I noticed that a little more of the tree had sprung into shape; but for the most part, we were still drooping. So, inside the tree came. I trimmed some more limbs out to lighten the mood. And on went the decor.

It’s not my best tree; but from the road, it looks just fine. I will say that decorating it definitely helped. I gave it a vodka and water last night to help spur it along. However, Peak Seasons and I will be having some words later today about the flocking process. I mean. What the flock?

IMG_2003

There aren’t many dishes that Dad talks about from growing up, but one that stands out are the stuffed artichokes his grandmother, Bena Guido, would make for an appetizer at Christmas Eve. A few years ago, I tried a recipe I found on pinterest. It was an all day affair to make these things; and while they were good, they weren’t Bena’s. However, I started digging through Nannie’s recipe box and (Voila!) I found a recipe for Stuffed Artichokes. I’m hoping that this is Bena’s famous recipe because I’ll be whipping it up at some point to test it out. (Fingers crossed.)

Stuffed Artichokes

4 medium artichokes

2 tablespoons lemon juice

1 cup dry bread crumbs

1/4 cup Parmesan, grated

1/2 cup parsley, shopped

2 ounces ham or pepperoni

1 medium clove garlic

2 teaspoons fresh oregano (or 1 teaspoon dried)

1/2 cup olive oil

1 teaspoon salt

Trim artichoke leaves and take fuzzy choke from bottom. Brush ends of the leaves with lemon juice. In processor, blend cheese with bread crumbs, parsley, meat, garlic, and oregano until the meat is finely minced. Stir in olive oil. Sprinkle artichokes with salt, open the leaves slightly, and stuff with 2 tablespoons of the mixture in each leaf. Sprinkle with remaining mixture. Put in shallow dish so they fit snuggly. Cover bottom of dish with water. Cover with foil leaving opening for vent. Cook on high 12 to 16 minutes turning every 4 minutes. Let stand for 5 minutes before serving.

23755492_10210426967932488_7868017095795197487_n

Well, today I start my 31st year and am excited to see what it brings. I have to say, thirty was a good one and will be hard to beat. Right before that big birthday, a friend told me she thought 30 would be my year. Was she right! A new job, which is what I’m thankful for this year. A crop of new friends, including a large-toothed nutria. New adventures that have brought me a little closer to home. Time was spent in New Orleans with Dad, Baton Rouge with Mom, and the Delta with my favorite kiddos. Top all that off with more weekends than I can count spent curled up with the Beagles. Thirty was welcomed and enjoyed.

So, tonight I’ll ring in 31 with the best of friends over dinner and a couple glasses of bubbly just in time for Turkey Day!


IMG_2004

This recipe is one that my Nannie, Doris Guido, made for every Thanksgiving and Christmas I can remember. When she realized just how much I liked it, it would show up throughout the year, too. I loved it. It was the crunch of the water chestnuts and Ritz crackers, the creaminess of that cheese, and all those veggies that I absolutely adore! Now, Doris loved onion. It was present in everything, but it’s perfect here. Add this to your Turkey Day spread. Trust me.

Zucchini and Squash Casserole

2 cups zucchini and squash, cooked and drained

1/2 cup mayonnaise

2 eggs

Salt and pepper to taste

Medium onion, chopped

1 cup cheddar cheese, grated

10 Ritz crackers, crushed

1 can sliced water chestnuts

Cook and drain the squash and zucchini, pressing out all the water. Saute onion in it. Mix together veggies with mayo, eggs, salt, and pepper. Add water chestnuts. Pour in greased 8-inch by 8-inch baking dish. Top with cheesed crushed crackers. Bake at 350 degrees for 30 minutes.

It’s no secret that I like Christmas. As soon as Hallmark starts running that marathon countdown and XM changes over to the jolliest of tunes, I’m instantly in the holiday spirit. Don’t misunderstand, though. I love all of fall. I love pumpkin spice like every other basic out there. I love seeing the leaves change and crisp fall days make their way into our lives. I love Halloween and dressing my Beagles into costumes that they absolutely hate. I even make room for Thanksgiving because, really, what’s better than a day solely devoted to eating, watching a Christmas parade, and then napping all afternoon? Plus, both my sister and I celebrate our birthdays in November, so we have an appreciation for the fall.

But what’s wrong with decking the halls early? What’s wrong with spreading a little Christmas cheer? I’ve already planned, ordered, and started addressing my Christmas cards. I’ve got 4 of my 6 trees up and decorated. Is there a Christmas wreath on my door? No. Do I have pumpkins on my porch? Yes. Have I already pulled out my Christmas PJs? Hell, yes. It’s cold outside. So, do us all a favor. Don’t judge those that decorate during the month of November and sing Fa-la-la-la-la under their breath at a moment’s notice. We’re just jolly, ok? It could be worse.

A few years back, we went to Mistletoe Marketplace and found a vendor called Rag Muffins out of Florida. She had so many adorable tea towels, and if you’ve been in my kitchen you know I have a tea towel for every occasion and I purchase one on every trip. She can take handwritten recipes and turn them into tea towels. So your favorite recipes can also act as artwork in your kitchens.

That Christmas, I sent the recipe for my MawMaw’s Okra Gumbo she had written in 1986 on a notecard and left in her recipe box for me to find 20 years later to be made into a tea towel for my mom. To say we had a tearful Christmas morning when that gift was unwrapped is an understatement. So while I don’t have any pictures of her making this gumbo, I have her handwriting to go by and hang on my stove when I miss her.

Okra Gumbo

1 pint frozen okra gumbo mix, thawed

2 cups water

1 16-ounce can tomatoes, not drained

1 pound medium shrimp

Salt to taste

Bay leaves

Combine mix, water, and tomatoes in a Dutch oven. Bring to a boil, cover, and simmer for 1 hour. Add shrimp and simmer for 20 minutes. Salt to taste. Remove bay leaves and serve over cooked rice.

Remember that Supper Club event I talked about a couple of weeks ago? I thought I’d share a couple shots from that amazing night on the bluff.

Anyone need plans for Sunday afternoon? Country Roads is hosting our 35th Anniversary shindig at The Myrtles in St. Francisville, and the tickets are flying. What better way to bring in the upcoming holiday season than with a little cheer, merriment, and an adventure close to home?

Has anyone else heard that song before? I remember it from early on and went down a YouTube rabbit hole looking for the origin. No luck, but there sure are a lot of crazy videos associated with chicken pot pie.

Chicken Pot Pie has to be one of my all time favorites. If mom was making it, I was thrilled. If it was in the cafeteria, I was the first in line. I dream about Fridays at Mammy’s Cupboard just so I can have this special, and I always ask if they have leftovers if I go on Saturday. In college, I tried my own version with crescent rolls. I’ve seen recipes on Pinterest for a Crock-Pot soup version. This is my mom’s version. You won’t be disappointed.

img_1317

Chicken Pot Pie

1 package pre-made pie crust

4 chicken breasts (or 6 thighs), boiled and cut into bite-size pieces

Broth, reserved from boiling

1 large can mixed vegetables

1 can cream of mushroom soup

Warm the soup and add the vegetables and cooked chicken. If too thick, add broth to thin. Pour into pie crust rolled into a greased pie plate. Top with remaining crust, crimp the edges, and cut vents into the top. Bake at 350 degrees for 35 to 45 minutes.

tt5189670-2-ipuht

Making a Murderer: Part 2

Ok, this is a bit of a spoiler alert. If you watched season 1 but haven’t started (or finished) season 2, skip to the podcasts below. When I watched season 1, I had a fishy feeling about Bobby Dassey. When they shared the timeline of events that day, I knew something was wrong with the fact that Bobby vanished as soon as Teresa Halbach left the property. I don’t think that Scott Tadych had anything to do with it, but Bobby’s demented self did.

And let’s talk about Kathleen Zellner for a minute. She is something else. That hair, those nails, her lack of emotion. Maybe I’ve been watching too much of season 3 of American Horror Story, but she would make a perfect Supreme.

BBLogoV2

Bear Brook

I stumbled upon this podcast yesterday when driving back and forth from Baton Rouge. I keep starting and stopping podcasts that just don’t keep me hanging on. This one seems like it will do the trick. It follows a double murder that is found by a couple of kids playing around in the woods back in the 1980s.

sddefault

Voodoo City

This one is just a treat for all of those looking for some trick in time for Halloween. The stories are quick and shed some light on New Orleans legends. Give it a listen!

IMG_1635

I’ll be honest. I’m not a fan of sausage in link form. It must be a texture thing because I love ground sausage. So, when I hear that red beans and rice is on the menu, I know it will be pick around the sausage night for me. However, I love the flavor that it leaves in the mix; so, leave the sausage in!

Red Beans and Rice

1 16-ounce can Blue Runner Creole Cream-style Red Beans

3 16-ounce cans Bush’s Light Red Kidney Beans

2 stalks celery, chopped

3 green onions, chopped

8 ounces chicken broth

1/2 pound sausage, sliced thin

1 cup ham, finely chopped

Add all ingredients to the crock pot and cook on high for 4 hours. Serve over white rice.

410tUCg8-dL

I have really gotten into trying to read the book before the movie comes out. One of my most recent was Crazy Rich Asians. I will say that I completely suggest doing the Audible version. It’s so nice to hear the names and towns pronounced correctly. It’s also amazing to hear the accents. It adds a whole new tone to the book. With the digital version coming out in a few weeks, get this onto your list. It’s quick, catty, and really satisfying.

It’s that time of year again. The balloons have completed their first race of the season, and the mayhem of Balloon Race weekend is underway. Who would’ve thought a couple of weeks ago when we were praying for temperatures below 90 degrees that we would be dealt this slate of fall weather to enjoy the best of the best?

Growing up, I have so many memories of Balloon Races past. One of the earliest is spending Saturday morning on a pallet in the driveway, snuggled up watching the balloons float overhead. I also remember my Dad’s first flight and him being christened with an upside-down champagne toast in the field next to the balloon he rode in. (Oh, don’t worry. Aimee and I tried to recreate this same toast at home with water and plastic cups, and their is VHS evidence out there somewhere.) Aimee’s first flight came later with cousin Stephen, and mine was just a few short years ago one Friday morning Hare and Hound race.

So, instead of sharing a recipe today, sending everyone to the grocery store, and spending time stuck in the kitchen, I’m hoping everyone plans on spending the weekend out of the house. Natchez has a full weekend on deck, so get out there and chase a balloon!

This weekend is the be-all and end-all for weekends to come to Natchez, be out and about in Natchez, and strongly consider becoming a Natchezian in your spare time. With the hot air balloons already floating around to excite the locals, we’ve got our fingers crossed for a weekend of calm and cool weather. So, come see us.

fc3276f4-4e2e-48d3-b43d-4db5db6c6dd1

But, we would also like to see you stay for dinner on Sunday night. Country Roads will play host after a long weekend for us locals and set out of spread that showcases the best views, tours, and dining in town in the second event of the Fall Supper Club Series. How do you become a member of the club? All you need is your golden ticket that can be purchase right here. Want to know what’s on the menu? Read a scrumptious overview here.

There are only a few tickets left, so hurry and grab yours now.


I know; I’m jumping the gun. But I love fall for many reasons — the main one being that Christmas soon follows. Last December, I hosted a little gathering for my Moscow Mule-loving friends and tried out a new recipe on them. The Cranberry Mule was a hit!


Cranberry Mule

Cranberry juice (not juice cocktail)

Ginger beer

Vodka

Fresh limes, cut into wedges

Fresh cranberries, frozen for garnish

Over ice, pour a shot of vodka into your mule mug. Top with half a can of ginger beer and finish with cranberry juice. Squeeze in a lime wedge and add frozen cranberries as a garnish. You could also add sprigs of rosemary for a Christmas-time look.

When I moved into my house, the first order of business was to paint. The house was spotless (Thanks, Elizabeth Turner!), and I was able to run straight to the paint department to start selecting shades of gray for every single surface. I was excited to paint the chocolate brown dining room a bright shade of gray to lighten the space. We found that the cabinets used as book shelves by the previous owners were actually better suited for china cabinets since a plate rail was on each shelf. Once we got into the process and did a little digging in the attic, we found that the glass doors to the built in cabinets were in perfect condition. They just needed a fresh coat of crisp white paint and to be rehung. This may have been the easiest face lift we have completed to date.

Last fall, Mom and I came across this recipe in an issue of Louisiana Cookin’ in hopes we could bring on feelings of fall. These are delicious, spiced to perfection, and a must bake this weekend.

DSC_0004

Cane Sugar Snaps

3/4 cup all-vegetable shortening

1 cup granulated sugar

1 large egg

1/3 cup cane syrup

2 1/3 cups all-purpose flour

1 tablespoon ground ginger

2 teaspoons baking soda

2 teaspoons ground cinnamon, divided

1/2 teaspoon kosher salt

1/2 teaspoon ground cloves

1/4 cup raw cane sugar

Preheat oven to 375 degrees. In a large bowl, beat shortening and granulated sugar with a mixer at medium speed until fluffy, 1 to 2 minutes. Add egg, beating until just combined. Add cane syrup, beating until just combined. In a medium bowl, stir together flour, ginger, baking soda, 1 teaspoon cinnamon, salt, and cloves. With mixer on low speed, gradually add flour mixture to shortening mixture, beating until combined. In a small bowl, stir together cane sugar and remaining 1 teaspoon cinnamon. Using a spring-loaded 1-ounce scoop, scoop dough, and roll into balls; coat in sugar mixture. Place dough balls at least 1½ inches apart on a large rimmed baking sheet. Bake until golden brown, about 13 minutes. Let cool on pan for 5 minutes. Remove from pan, and let cool completely on wire racks.

So, what is my house missing (besides a dishwasher and actual en suite bathroom)? A fireplace. I feel like every home needs a mantle. And since I grew up in a home with a brick fireplace as the focal point of the living room, it was something I wanted somehow in my chimneyless house. Luckily, my Dad is Mr. Fix It and was able to build a mantle for me.

I had the perfect empty wall in my dining room, so for my 27th birthday, dad built a mantle into my house. We spent hours in the molding department at the hardware store trying different layers. Corbels versus none. Details versus simple. What we ended up with looks like it should have always been there. Hopefully I will find the perfect iron grate to place in the hole where the fireplace would be. I’ll keep my eyes peeled in the mean time.

With a weekend of football ahead of us, go to the store and pick up these items. You will be glad you did when having your own at-home tailgate in front of the TV. It’s our family’s favorite, and I can’t believe I haven’t shared it before now.

tumblr_inline_nsmm01SL591ql71ln_1280

Seven-layer Mexican Dip

1 small can Frito bean dip

1 package taco seasoning (low sodium)

1 8-ounce container sour cream (plain Greek yogurt)

1 12-ounce container guacamole

1 package shredded taco cheese (low fat)

3 ripe tomatoes, diced

1 small can black olives, sliced

3 green onions, chopped

In a small bowl, combine the bean dip and taco seasoning.  Spread bean mixture on the bottom of your serving piece.  In another small bowl, combine the sour cream and guacamole.  I now substitute with the Greek yogurt; and, honestly, I like the taste better.  Spread this mixture over the bean dip layer.  Add the bag of cheese to the stop.  Spread the tomatoes and olives over the cheese, and top with the green onions.  Serve with tortilla chips or Frito scoops.

Since celebrating 6 years in this little house on Auburn last week, I’ve been looking through the before and after photos I have showing some major changes we’ve made over the years. So, I thought I’d share a couple of those projects with you.

When I bought my house in 2012, we found wall furnaces in so many rooms that were no  longer in use, actually removed the ones in the bathrooms and kitchens right away, and covered the holes they left. However, there was a pair of furnaces in the living and dining rooms that were in the wall and the floor that posed quite a problem. However, after a couple of years of thinking, dear ole Dad came up with the perfect Mr. Fix It fix. He was able to recreate the look of the built-in china cabinets into matching book shelves  to cover not only the holes in the walls but also the missing hardwood floors. Plus, who doesn’t need more built ins?

Yesterday marked 6 years as a homeowner, and I have loved my relationship with my little house on Auburn Avenue. We get along nicely, and it doesn’t mind when I continually make it change and update its style. Over the past year, it’s seen a new coat of paint on the shutters and doors. It’s now got a nice pair of bathrooms that match. The blinds are slowly being changed out. (20 windows takes time and money.) We even got a little update in the laundry room (and some shiplap). I’d say it’s turning out nicely.

Hopefully over the next year we will see a fresh coat of paint for the siding. I wouldn’t mind a little hail damage either (hint, hint Mother Nature).

Happy Birthday, House!

September 17, 2012

img_1272-1

Every year brings back those same feelings from 2001 of anger, fear, and patriotism. In 2013, I had the honor to visit Ground Zero during a quick trip to the Big Apple. It may have been pouring rain but I wasn’t going to miss the chance to visit such a sacred American monument.